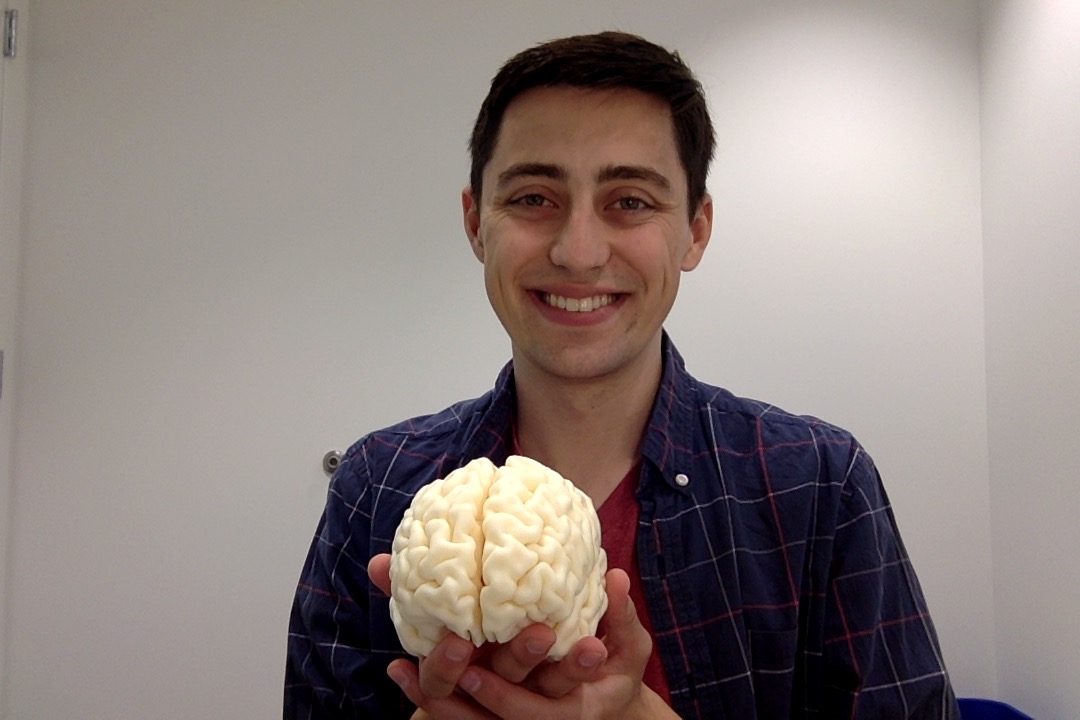
I 3D-printed my brain!
A few months ago Matt, another grad student in the lab, suggested that we try to 3D-print our brains. Well, we finally did it! Here's how...

When I 3D-printed my brain, I loosely followed this guide found on Instructables. I've included my own detailed instructions below. They assume some basic level of comfort with Linux commands and navigating a computer through a Terminal. Moreover, this process requires some sort of access to a 3D-printer and some patience while working with unfriendly software. Also, this method gives you a print of the cortical surface, but leaves out the cerebellum and brainstem. Maybe someday, I'll look into printing the entire structure... If you have any questions or want to show off your own finished product, send me an email!
Step 0: Setup Your Computer
In order to reformat your MRI scan so that it's suitable for printing, you'll need to set up your computer to run Freesurfer and Meshlab.
- Freesurfer
- Meshlab
If you are working on a Mac or Linux machine, you can download Freesurfer directly onto that machine. Freesurfer is not compatible with Windows, but I've heard people use VirtualBox to create a Linux environment on their windows machine. If you're lucky, your university or workplace already has Freesurfer installed on a compute cluster (things will run a lot faster).
Before printing my brain, I had never heard of Meshlab, but I found it relatively easy to use and install. You can download Meshlab directly from their website.
Step 1: Get an MRI Scan
Don't have access to a scan of your brain? Check out the teaching hospitals and universities near you. Chances are, they have some ongoing research studies that you can volunteer for. You'll want a T1-weighted image of your full brain. (Supposedly, a T2-weighted image will also work.) If you ask, the experimenter can usually send you a copy of your structural scan on a CD or flashdrive.
- Load the Data onto Your Computer
- "Unpack" Your Scan
This step is mostly up to you and your personal preference. You'll want to create a folder somewhere that is easily accessible for later. This might be on the Desktop if you're using a personal computer, or somewhere on a shared directory if you're using a compute cluster.
The image will probably come in DICOM format. This means that each "slice" of the brain image will be stored as a separate file
with the extension .dcm. The filenames will usually be a long string of computer-generated numbers and they should
all be in the same folder. To make the scan easier to work with, we will convert it to standard NIFTI (.nii) format.
You can use a program like dcmunpack to convert to NIFTI (.nii) format. Here is an example of how I run dcmunpack:
First, change directories to the location of the folder that contains your DICOMs
~$ cd /location/of/DICOMs
~$ ls
   folder_of_dicoms
   anotherfile.txt
   file.txt
~$ dcmunpack -src . -targ my_brain_unpacked -run 1 anat nii anat.nii
Step 2: Create a Surface File
- Set Up Your Subject Directory
- Run recon-all
You'll want to use Freesurfer to convert your 3D image into surface files. You'll run the recon_all
command to do this. (recon_all can take a day or more to run, depending on the type of computer you are using.)
The documentation for Freesurfer's recon-all command can be found here.
This command can be tricky to run if you're not familiar with Freesurfer, so don't hesitate to consult your local Freesurfer guru (or Google) with questions.
First, you'll want to set up your scan with the standard Freesurfer directory structure. It should look something like this:
+ subject_name
|   +-- mri
|   |   +-- orig
|   |   |   +-- 001.nii
The file, 001.nii is your brain scan that you unpacked earlier. Before we run recon-all we just need to convert the file to
.mgz format with the following command: mri_convert 001.nii 001.mgz. Also, you'll want to update the enviromental variable
SUBJECTS_DIR and set it to the location of your subject_name folder in the directory structure I outlined above. (e.g. export SUBJECTS_DIR=/path/to/subjects_directory)
Now you're ready to run the recon-all command! I recommend that you run this on a compute cluster if you can, to speed things up. Even on a cluster, you might be looking at upwards of a 10-hour runtime,
depending on your settings. The command I run is this: recon-all -all -subjid subject_name.
When the command has finished, you should see a folder subject_name/surf. There will be a ton of files in this folder. The two you are interested in are lh.pial and rh.pial. You can
open them in Freeview (Freesurfer's viewing tool) to see a rough idea of what your 3D-printed brain will look like. In the next steps, you'll do some file-conversion and cleanup to prepare the images for printing!
Step 3: Reformat for 3D-Printing
- Convert to .stl Format
- Load Into Meshlab
Using mri_convert again, you can convert the surface files to ".stl" format. This is the file format used by most 3D-printers.
Then, using a program called Meshlab (freely downloadable online) you will need to combine the
two hemispheres into a single file and "smooth" the surface in order to get a nice print.
You'll use Meshlab to combine the two hemispheres into a signle file, and smooth out the edges a bit. To import the files into Meshlab,
click "File -> Import Mesh" and select the .stl files for each hemisphere. Now, because the shape of the surface files
is very complex, we do a little bit of smoothing to simplify the file and make it easier to print. To do so, click "Filters -> Remeshing,
Simplification, and Reconstruction -> Simplification: Quadratic Edge Collapse Decimation. In the screen that pops up, enter 150,000 into
the "number of faces" field and click OK. Finally the Instructables Tutorial suggests adding a second round of smoothing
with "Filters -> Smoothing, Fairing, and Deformation -> Laplacian Smooth." Personally, I thought this erased too many of the imperfections
so I opted out of this step, but it shouldn't make too much of a difference.
Step 4: Send it to the 3D-Printer!
At my university, I was able to send the .stl file over to the engineering department, where they have a 3D printer available for students. If you don't have access to a 3D printer at your school, home, or work, there are websites that will print an .stl file for you and then send the finished product in the mail (though, this can get quite expensive). I'd also suggest that you look for a "Makerspace" in your local community. These sorts of "open workshops" are popping up more and more - giving local artists and hobbyists access to an assortment of shared tools, often including 3D printers. When you print your brain, you'll need to specify the scale. My MRI had a voxel size of 1 x 1 x 1mm, and at a 1:1 scale, my entire 3D-printed brain measured about 100 x 100 x 150mm.
The Finished Product

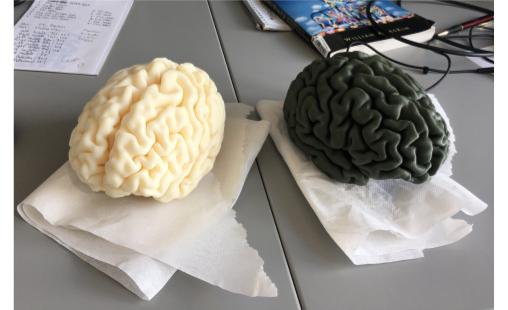
Overall, I was pretty impressed with how the print came out. In the image, you can see my brain printed in white, and Matt's brain printed in olive green. Since we got the prints done for free from the Engineering department, we didn't get to pick the color, but I think both colors look great regardless. When I picked up the brains from the printer, they were still wet, so I left them out on some paper towels overnight. We've talked about creating some sort of pedastil or something to display these models in the all the glory they deserve... we'll see! Happy printing!